

- Glue gun with glue sticks (2-3 sticks should be enough)
- Snow Globe Snow orSnow Flake Confetti
- Disney Characters of your choice
- Wilton Food Glycerin
- 4 Clear Mason Jars with lid and rings


Take your character of your choice and hot glue it to the inside of the flat lid of your mason jar.
Repeat with your other characters and set aside.

Take your hot glue gun and run a bead of glue on the inside rim of the ring. The metal will get hot so this is a step parents should probably do. While it’s still hot, place your characters on their lids into their ring and press firmly. This will push out any extra glue and makes sure you have a good seal.


Add a handful of your snow globe snow or snow flake confetti to the bottom of your jars. One bag of the confetti is great for four different jars!
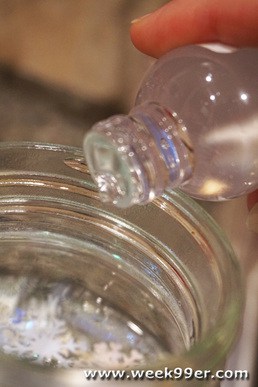
Fill your jars up to the bottom of the screw line with water. Add in a few drops of the food glycerin.
The glycerin will stop the snow and/or confetti from clumping together. It’s not required but it helps keep your snow globes better longer!
With your hot glue gun, run one more bead of glue on the inside of your lids. This time you will be working around the characters so be careful! As you complete each screw them onto their jar firmly. Be aware of where you are placing your characters if your jars have any stamps in the glass you don’t want interfering.
Once your lids are cool, flip the jars over and shake them up!
Tips:
- Straight jars are a bit better for this project than the ones with “shoulders”. The lines tend to distort characters a bit.
- Clear jars are great for this but some of the tinted or colored glass could be a lot of fun too!
- You can paint the lids, use decorative tape or ribbon to finish the jars as well!
- Be aware of how your characters are posed….As much as I love Wall-E, his arms tend to capture more snow flakes than anything. It almost looks like he’s getting buried in snow ;).

|


These are so cute– we made them last year for the Grandparents for their gifts